One of the most powerful features of Marcode is that you can add custom CSS directly affecting layers and groups inside Sketch or Icons8 Lunacy.
Adding a fast and small CSS animation library like Animate.css is a breeze, not to mention extremely fun. Using external CSS animation libraries opens up a way to experiment with real code scenarios directly inside your design application.
But let’s start with the basics, we’ll cover adding CSS animation libraries in upcoming articles.
What is a CSS plugin?
A CSS plugin is nothing more than a .css file that you create using a code editor like Visual Studio Code. Simple as that. What CSS you add it’s up to you, here’s an example:

The only thing that this CSS plugin does is to create a border radius of 12px on all of your images. Why? The class img is the default HTML image class name for all images that you add.
You can also have several CSS snippets inside one plugin, in fact, you can have as many as you want.

Here we have added another CSS snippet to our .css file, let’s break them down:
- img adds whatever border radius you want to all of your images
- centerityo Centers whatever group or layer you want right in the middle of our built-in Bootstrap grid
Furthermore, as you have learned by above examples, classnames can be called anything you feel for. Just make sure to avoid using special characters and stick to English.
Let’s create a .css file
It’s super easy. Let us break down each step for you, after this you will feel like a super designer with some added extra developer skills. Pinkie promise.
- Use a code editor like Visual Studio Code to create a new file
- Add some custom CSS code, you can use our example from above
.img {

  border-radius: 18px;

}

.centerityo {

  display: grid;

  place-items: center;

}
Make sure to save the file as yourname.css
Let’s get the correct file path
Drag the newly created .css file to the Mac’s Terminal app, you will need the correct file path for linking this inside Sketch or Icons8 Lunacy.

- Copy the file entire file path to clipboard, it usually starts with /Users/…
- In Sketch or Icons8 Lunacy use the Text tool and copy the file path from clipboard into the Artboard where you want to add your custom CSS plugin
- Add file:// just before /Users/etcetc ending up with file:///Users/etcetc…
- In the Side Panel (Sketch) or Left Panel (Lunacy) name the Text layer {externalasset.css}

- Make sure to copy the Text layer {externalasset.css} to all the Artboards using your custom CSS code
- You can add as many {externalasset.css} layers as you need, for example when embedding your web fonts
How to add your custom CSS to layers and groups
So now that you have done all the hard work creating your custom CSS plugin and getting the connections right, it’s time for the real fun part; attaching them too layers and groups inside Sketch or Icons8 Lunacy.
Let’s use our built-in Template for App Portfolio as a use case.
Since we already have everything setup, lets reverse engineer our custom built component that we call Nice Card with Image Link in our template.

When we have clicked all the way down to the linked image component it looks like this:

Let’s have a quick recap from our previous article about how our markup works:
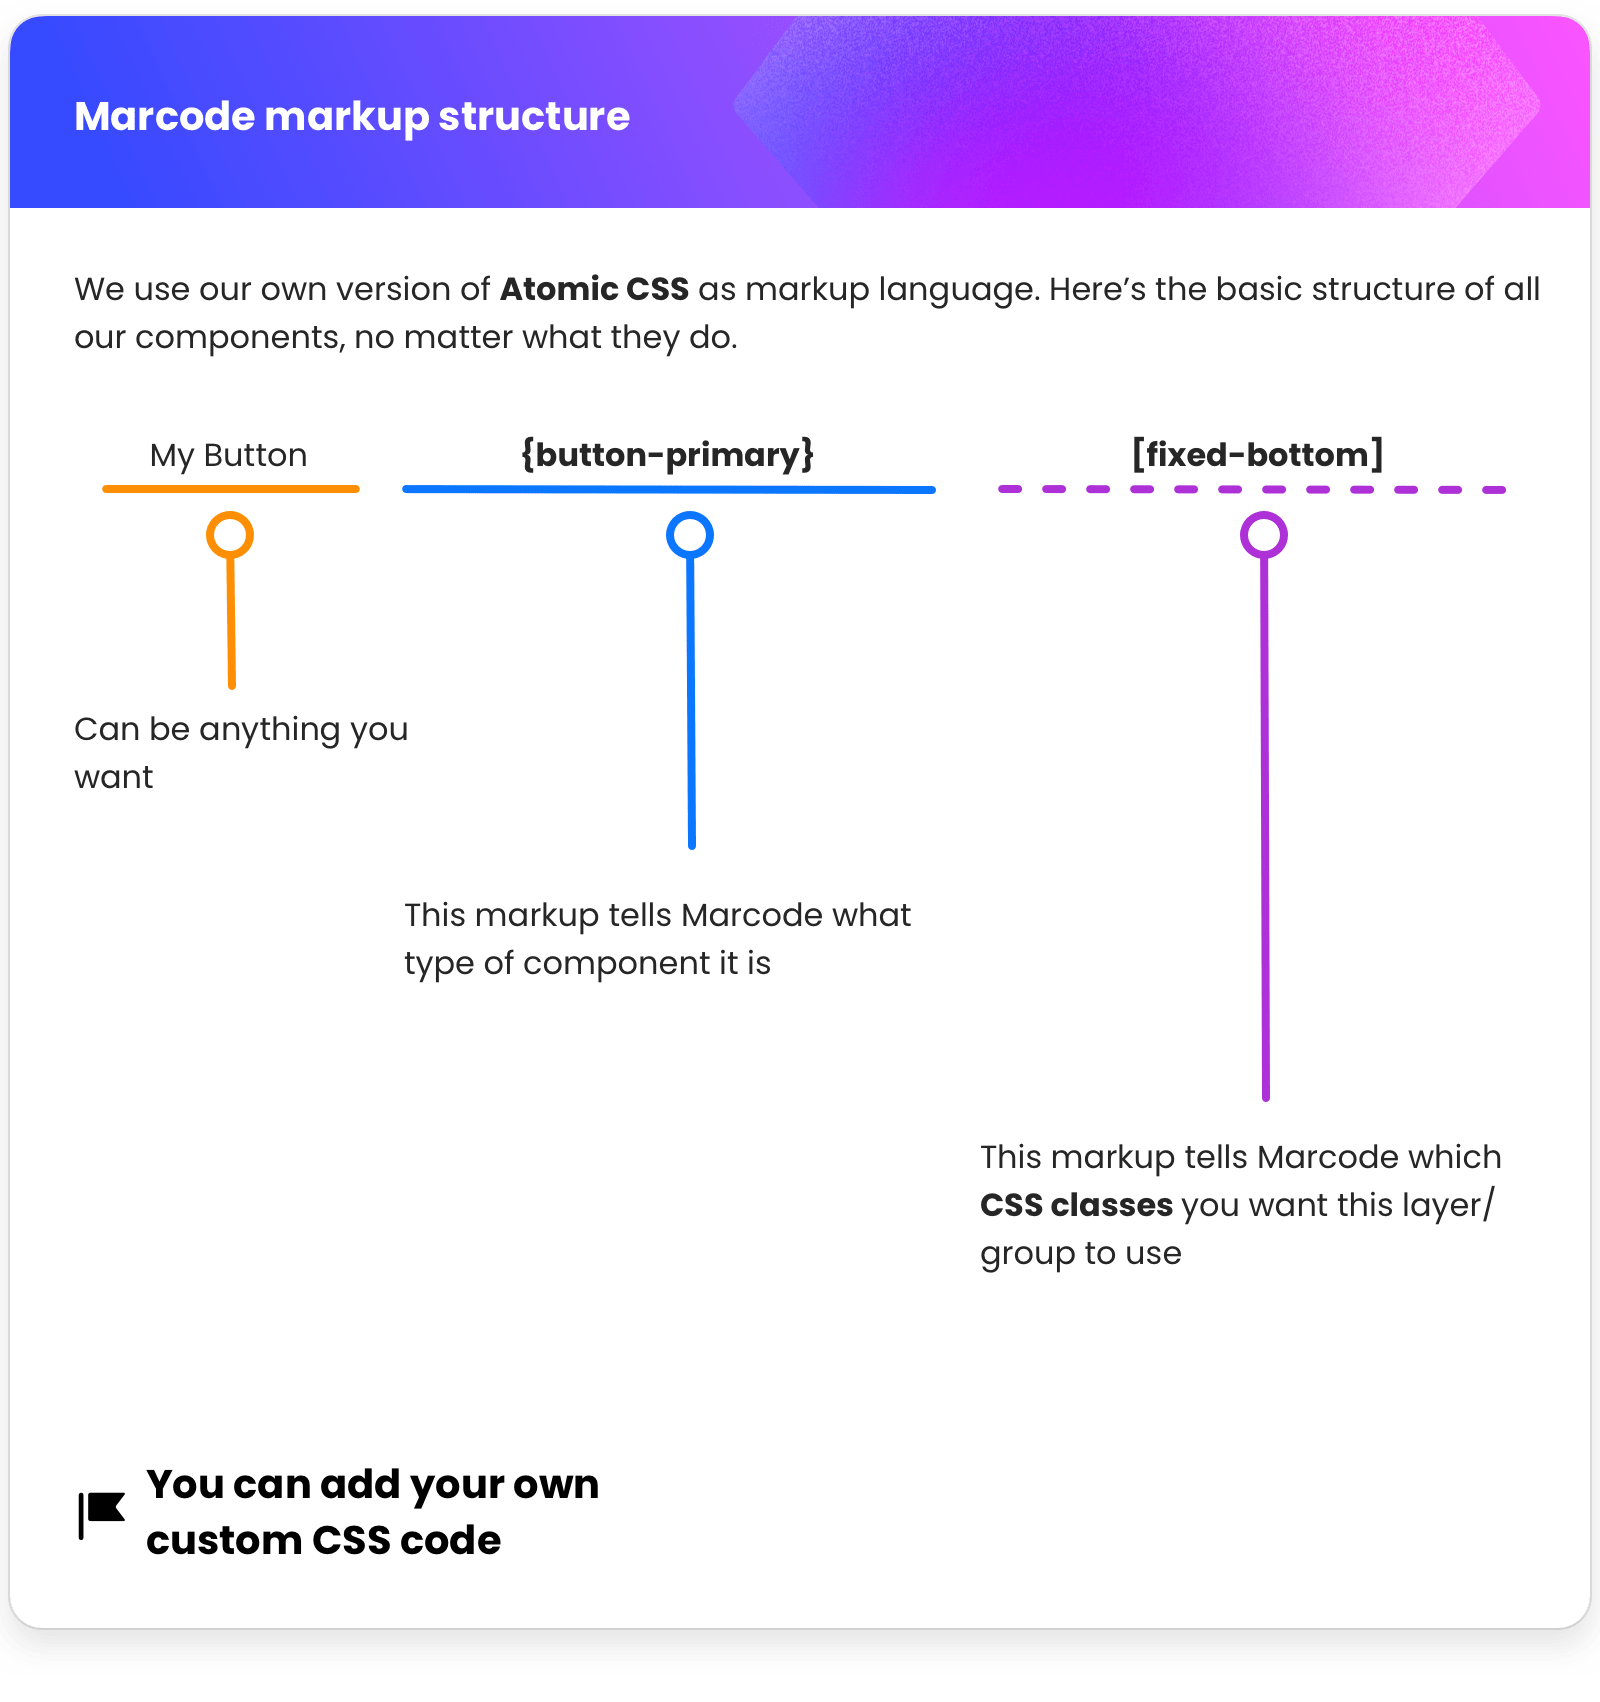
All custom CSS plugins gets attached to the layers or groups of choice by adding the class names [inside like this]. Easy-peasy! It may look complicated at times, but if you understand this very basic logic, everything else will make more sense. Pinkie promise.
By adding the class name img on a master symbol component, when we look inside Marcode it looks like this:
